
I thought it was a good idea to incorporate a matrix patching system, similar to that used by EMS for the revered VCS3 and subsequent Synthis, into my Eurorack modular system and thus be able to explore new and different patching methods. It is only after I started the project that I discovered that the concept of a stand-alone patch matrix to use with modular equipment is not exactly new...

Please note that the above pictured matrix is not an official EMS product !
Such a patching system pushes one to think out his patches differently and also gives more easily "happy accidents". Also, this system let's me prepatch a series of modules to the matrix and I can change the patch very quickly just by switching the pins, by adjusting a few settings on the modules and not having to unpatch and repatch every single module... quite a time saver.
Attenuator banks were added, that can be patched in freely on in- and outputs of the matrix.
This comes in handy when some signals coming from modules need to be attenuated (of course if there is no output attenuator installed on the module for that signal), same thing for the signals that go back to unattenuated inputs of the modules.
50K Lin pots were used for attenuation of CV signals and 50K Log pots for audio signals.
Attenuators are stand-alone, have input and output patchpoints so they can be put into the signal path or not.


The system was intentionally designed unbuffered, (original matrixes on the EMS instruments were also unbuffered) to retain it's share of unpredictability and joyful weirdness.
Installation of a buffering, as described by Graham Hinton , was an option but the precision and stability that a buffered system offers is not really justified or necessary for the type of work I have in mind.
Also background noise and crosstalk are kept to acceptable level without any active circuitry.
Of course, there is obviously some crosstalk of adjacent signals...it all depends on the nature and amplitude of the signals and this problem can easily be addressed by patching otherwise. This has it's charm and I certainly can live with that !
Simple contacting pins are used (the blue ones). Pins with diodes can be used (the red ones), but these block one half of the period of bipolar signals. Still, diode pins can provide some interesting results for specific applications and can prevent signals to go where they should not go within the matrix.

Panels were designed with Front Panel Designer and manufactured by Schaeffer AG
I chose to split up the panels in three parts :
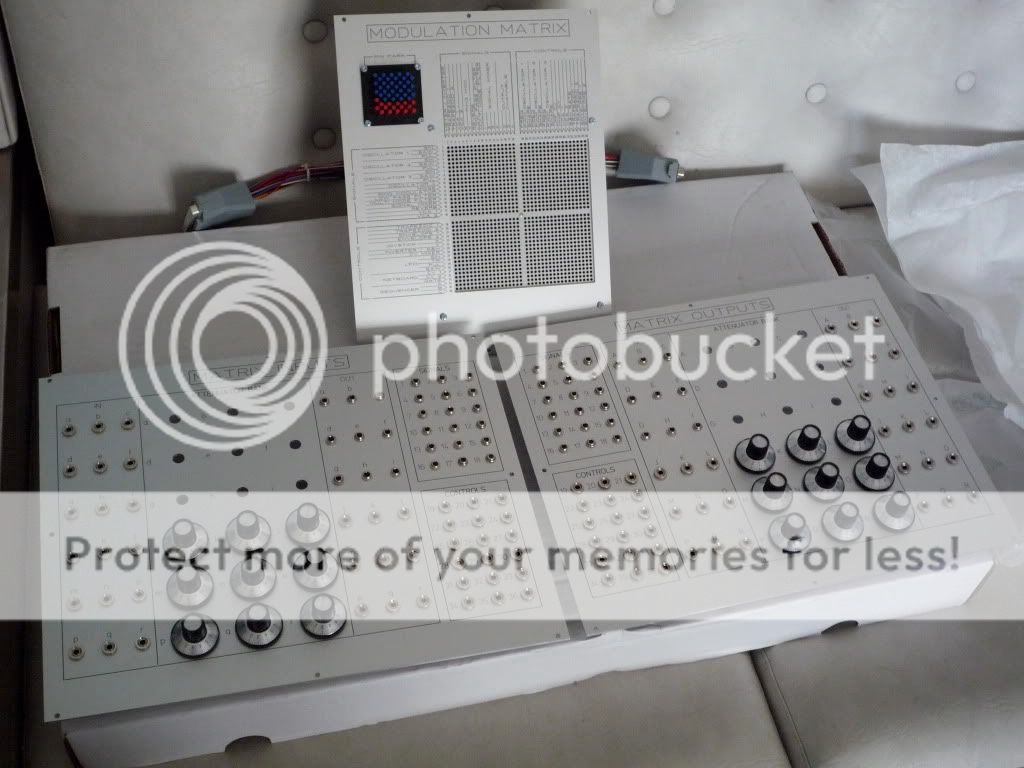
1 panel for inputs with attenuator bank and 1 panel for outputs with attenuator bank.

1 panel for the main matrix and a smaller 10x10 matrix as "pin park"

The three together are sized 168HP wide and 6U high, so that I will be able to fit it perfectly in the custom cabinet I plan building in the future for my Eurorack system.
All inputs and outputs of the matrix are wired to Sub-D 37 connectors (36 signals and one common "ground" per connector), so are all the inputs and outputs on the respective panels, this to ease up maintenance and thus not having to remove all three panels at the same time whenever maintenance would be needed.

Assignment of signals to the matrix rows and columns is totally free, but still, I was inspired by the EMS matrix assignments and adapted these to the in my system available modules, i.e. transcription of patches from EMS "dopesheets" to my system is very fast and easy.

Buttons for the pots were purchased from Banzaï Music and are the following type : Rotrik Knob SM-29

In use the FriFri deluxe is a breeze, its clear and logical design makes for effortless identification of sources and destinations. Readability of the patch is quite good. The ergonomics are far from bad, even with all inputs and outputs fully patched, the matrix remains accessible. Though, it is sometimes difficult to remove pins that are inserted one next to the other as the spacing between contact points is very tight, but one gets used to this quite easily.
Usage proved that the best location to place it in a "large" system is at the bottom, horizontally or on a slight angle; or, even better, vertically in the highest position in the cabinet. This placement prevents any patchcords from "hanging" over the matrix. Until the custom cabinet for my Eurorack modular is finished, I chose to place the FriFri deluxe central in my system.

Even if this system is far from perfect, I love it, it does perfectly what I designed it for and what I expected it to do. I learned to work around or with its inherent flaws or quirks and results are very often satisfactory, different from the patches produced with the "classical" patching method.
I've uploaded a set of patches on my Soundcloud page which illustrate the combination of the FriFri Deluxe patch matrix with a selection of Eurorack modules : The Synthi experiment

<<<<<<<<<<<<>>>>>>>>>>>>
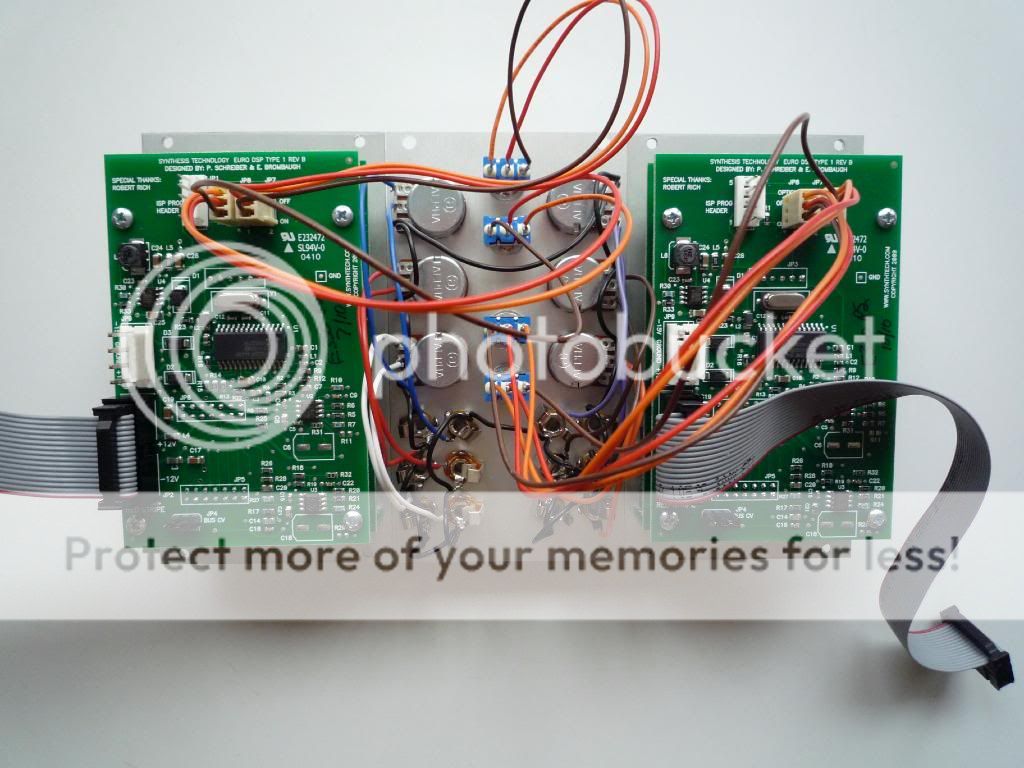
My second SDIY project in the making is an expander for the Synthesis Technology E350 Morphing Terrarium.
The Morphing Terrarium is a wavetable oscillator with some "hidden" features, accessible via jumpers on the PCB. The idea behind this expander is to bring those jumper options to a frontpanel for hands on switching without having to power off the system and to screw out the module.

Before explaining the functionality of the expander, I have to explain how the E350 works.
In normal setting, the E350 outputs two independant waveforms (at a common frequency as set by the Coarse panel control and by the 1V/Oct CV input), respectively available on the X/Y output and Z output. Wavetables are arranged in a 8x8 matrix and selection of the wavetable for X/Y output is, logically, done with the X and Y coordinate panel controls. In other words, the coordinates of the pointer in the matrix are set with the X and Y controls. The Z output functions slightly differently as there's only one panel control for selection of the wavetable. This Z control goes sequentially through the matrix starting at wavetable 1 and going to wavetable 64.
Also note there are individual, unattenuated CV inputs to the X, Y and Z panel controls to be able to modulate the position of the pointers in the matrixes.
Interesting is the fact the E350 uses a morphing algoritm to smoothly go from one wavetable to the next (hence the name of the module). This algoritm calculates intermediate waveforms in realtime . On top of that, the E350 uses waveform interpolation to make transitions even smoother.
One of the jumper options lets you have interpolation enabled or disabled. By disabling the interpolation, "glitches" and other digital artefacts appear at both outputs when changing the coordinates of the pointer in the wavetable matrix.
The other jumper option takes the module from Morphing Mode to Phase Shift Mode.
Here one selects a wavetable with the Z control and that wavetable will appear at the Z output. That same wavetable will also be available at the X/Y output but in variable phase shift to the Z output. The X panel control will set the degree of phase shifting, ranging from 0° to 360°. The Y panel control now acts as a simple polarizer, multiplying the X/Y output signal with a digit ranging from -1 to +1.
So, now we have all the elements necessary for elaboration of the expander :
- a switch to enable/disable interpolation
- a switch to go from Morphing Mode to Phase Shift Mode
- attenuators for the X, Y and Z CV inputs to control the depth of the respective modulation


As I have 2 E350 modules, I doubled above feature set and arranged the panel layout so to be as close as possible to the orignal E350 design. The design is easily adapted to one and only E350.
Pots are Alpha 50K Lin
Switches are Miyama ON/ON toggles
nb. I could have used the same fantastic pots and switches as the ones used by SynthTech for the original E350, but they are hard to find in Europe and too expensive to buy in the US on a small quantity basis
Use 3 pole female "jumper hoods" with cable (like the ones used to connect PC fans) to connect the switches to the jumpers
Panel design was done with Front Panel Designer and manufactured by Schaeffer AG
Buttons were selected also in respect to the originals to reinforce the impression of a Synthesis Technology E-series module : Volcano Knob
Please refer to the E350 DIY Kit manual and to the E350 insert or contact Synthesis Technology directly for more information
Proceed to my Soundcloud page for examples of two E350's in use with the dual expander