

Ever since I've been into synthesis, I was fascinated by the odd looks and sounds of EMS instruments.
Some time back I met Constantin through the release of the excellent The Synthi Group VOL.2 compilation. We soon discovered we have lots of things in common music wise, a similar approach to electronic music production, similar tastes in music and the same immoderate passion for EMS instruments.
Constantin is the happy owner of a lovely Synthi A and an AKS. We sometimes play together and each time he brings his machines along to my place, the passion grows stronger. Not only the passion grows stronger, but also the frustration because EMS instruments are so rare and they go at such crazy prices these days.
That frustration made me search for alternatives in the SDIY world, and I found some... But, lacking the necessary competences, time and finances to build an EMS clone, I had to go for another solution.
All of a sudden it all became clear to me, I had all the modules necessary to assemble a hardware emulation at hand, within my Eurorack system. I already had the possibility to patch up my Eurorack system in an EMS like configuration with my FriFri Deluxe patch matrix . I pushed that idea a little further by taking those modules out of that general Eurorack context, to create a self contained, autonomous and independent instrument... this is how the Little Putney was born, my take at a hardware emulation of the EMS VCS3.
Let's start with the cabinet. The design I made was to recall the distinctive VCS3 silhouette, without being an exact replica. So, I'm off to the DIY store to get some wood and stuff to build a cab...
Here we go :
The bottom part :


With the upper part :


Testing the modules fit :

The first attempt at staining the cab is not satisfactory, the tint is too "red" :


After a couple of sanding sessions and a few layers of "Wenge" staining, this is a more appropriate finish. Also incorporated the backpanel with power supply and busboard, that was taken from an Analogue Systems RS-15 case, and fitting the bottom panel :


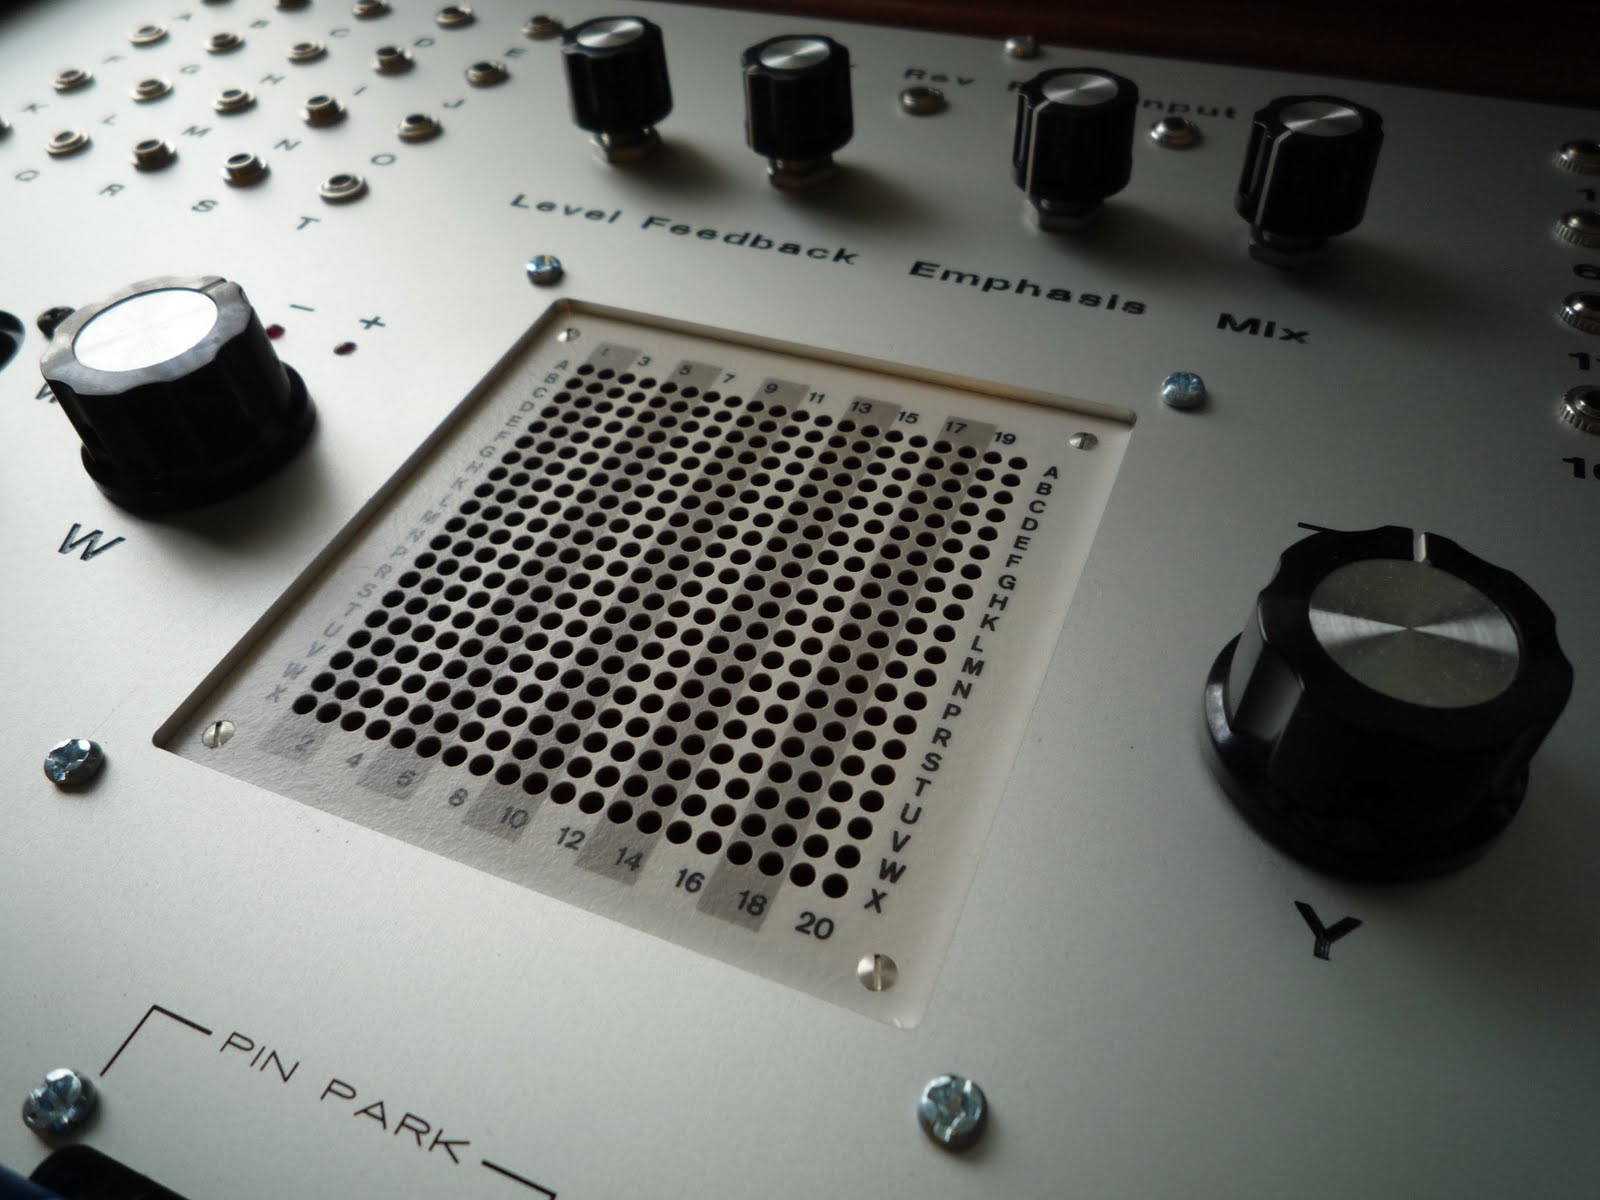
A VCS3 hardware emulation would not be complete without a patch matrix, a joystick and a spring reverb. So, once again, I did a design for a panel with Front panel designer and had it made by Schaeffer AG . The panel is designed to hold a 20x20 matrix by Ghielmetti, a 10x10 matrix as patch pin holder, two Doepfer A-174-1 joysticks, a Doepfer A-199 spring reverb, 20 input jacks to the matrix and 20 output jacks from the matrix.


Fully assembled and ready to roll, at last !

Now for the details of the Analogue Systems module selection, from top to bottom and from left to right :
1x RS-420 Octave controller
3x RS-95e VCO
1x RS-500e EMS Synthi filter
1x RS-20 Ring modulator/multiple
1x RS-510e EMS Synthi trapezoid generator
1x RS-40 Noise, S&H, clock
1x RS-70 Inverter/preamp
1x RS-165 Audio signal mixer
1x RS-190 Meter/inverter
1x RS-390 Mono in / stereo out echo
2x RS-180 VCA

This configuration is to cover a maximum of EMS functionality with some left out but with some add-ons that are only available to owners of modded Synthis/VCS3s like osc sync, variable waveshape on all waveforms, selectable 18dB/24dB slope on the filter, switchable slew on the cutoff, bipolar trapezoid output, etc...
Results are sonically convincing, even though I'm aware that this synth does not, and never will, sound the same as a genuine EMS synth because the magic of the EMS sound resides in the particular interaction between modules, the quirkyness of their respective responses and the "quality" of the components used for the circuits...for example the "sound" of the VCA's
or the reverb driver circuit !
The reverb tank is mounted on the back, outside the cab, to prevent it picking up transformer hum from the power supply.

Here he is for his first night out, with his friends TTE & Moisturizer.

And finally, back home, with some new and slightly smaller knobs to replace the old Eagle fluted that were a bit large and hiding some of the panel graphics.


Next step will be the redesign of the bottom panel. I will sacrifice the left joystick to implement 9 passive attenuators to control the amplitude of the oscillator waveform outputs. Also, I intend to design a single panel to hold the Analogue Systems modules and thus reinforce the visual unity between upper and bottom panels, as the original panels differ in color depending on the batch and some of the legending wears off.
Stay tuned !
vraiment une SUPERBE réalisation, félicitations ( Greenblue )
ReplyDeleteApres le Little Putney, on attend avec impatience le Giant Delaware...
ReplyDeleteLa vie est un long fleuve tranquille ...
ReplyDeletewhy don't you make the internal commutation of the cables?
ReplyDeleteand just draw a legend near the patch-panel to prevent all that cables horror
Well, it's easier said than done... First, If I wanted to hardwire all ins and outs of the modules, I would have needed a huge and very, very expensive matrix.
ReplyDeleteSecond, it's very difficult to solder out pots and jacks from those delicate PCBs without damaging the circuits themselves or even some components. This is exactly what happened when I integrated the joysticks and the spring reverb, but those are cheap enough to be replaced...didn't want this to happen to my precious Analogue Systems modules :-)
Also, I don't need all ins and all outs to be patched up all the time. It's perfectly possible to patch up the synth with just a few patch cords and still make some interesting sounds !
thank you for an answer
ReplyDeletei'm thinking about buying one ghielmetti 20x20 panel
how did you connect the wires?
i see only one pin per connection and jacks have 2 connections
thank you
roman
The lugs of the matrix are to be connected with the "tip" lugs of your jacks.
ReplyDeleteThe "sleeve" lugs of the jacks are interconnected to form a common loop.
There's no common connection to the matrix.
Hello and congratulations for the beautiful synth you have built here. I must say you have very good taste (overall in all I've seen in your page)! It's inspiring.
ReplyDeleteI'm building a synth based on Asys modules only and I'm thinking about replacing the pots with the volcanos as well. I also plan to put some transparent colored film in the metallic plate of the pots so they can still maintain their color meaning. Are they a good change in the long term or have you got tired of them over time?
Another question please: I just bought 3 RS95e but they didn't come with the nice blue thing in the pots. Is it something you added or they came with it?
Cheers!
Thank you for the kind words, Alberto :-)
DeleteThe Volcano knobs are perfect for the ASys modules, just about the right size and they feel good. I did try several types of knobs and those Volcano where the type I felt most comfortable with and that I found most visually pleasing as well. I didn't feel the need to retain the color coding of the controls, but if you have a method to cut out nice circles, why not !
I bought those RS95E with the blue center Vernier dials new, I also had some other RS95E without that...I guess I was lucky :-)
Cheers,
Z.
Thanks for the reply!
ReplyDeleteActually I've tried the volcano knobs already, since I have a Dark Energy which has exactly these. I find them much easier to turn than the originals even with just one finger, and specially the octave controller selectors.
My only concern is the lack of color in the whole finish, hence the idea of coloring the knobs in some way, just like the good old EMS synths. :)
Cheers!
Wonderful! I love it! I'm working away on a much much simpler version - using a bunch of XR2206:
ReplyDeletehttps://www.youtube.com/watch?v=MyXW6fGWnV8
I've sourced a vintage Russian 10x10 matrix, so I'll probably design something with fewer contact points.
A very simple pin connector patch matrix may be designed with a breadboard also; this actually worked:
https://www.instagram.com/p/COx8jwDpdY_/
Anyhow! Thank you so much for this webpage! Very inspiring!